 Save to Pinterest
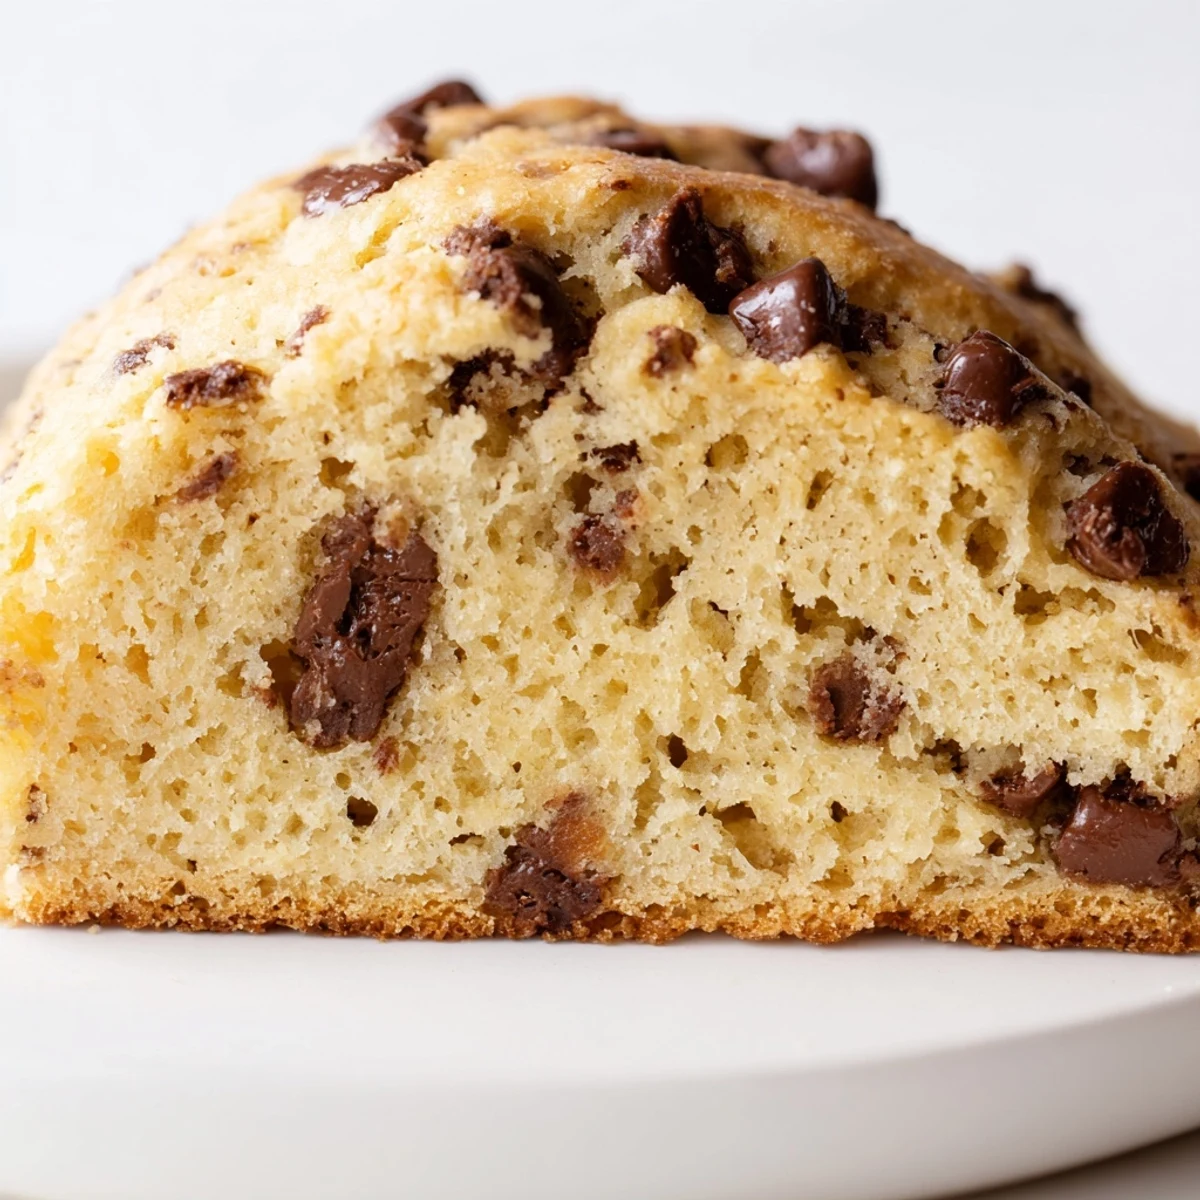
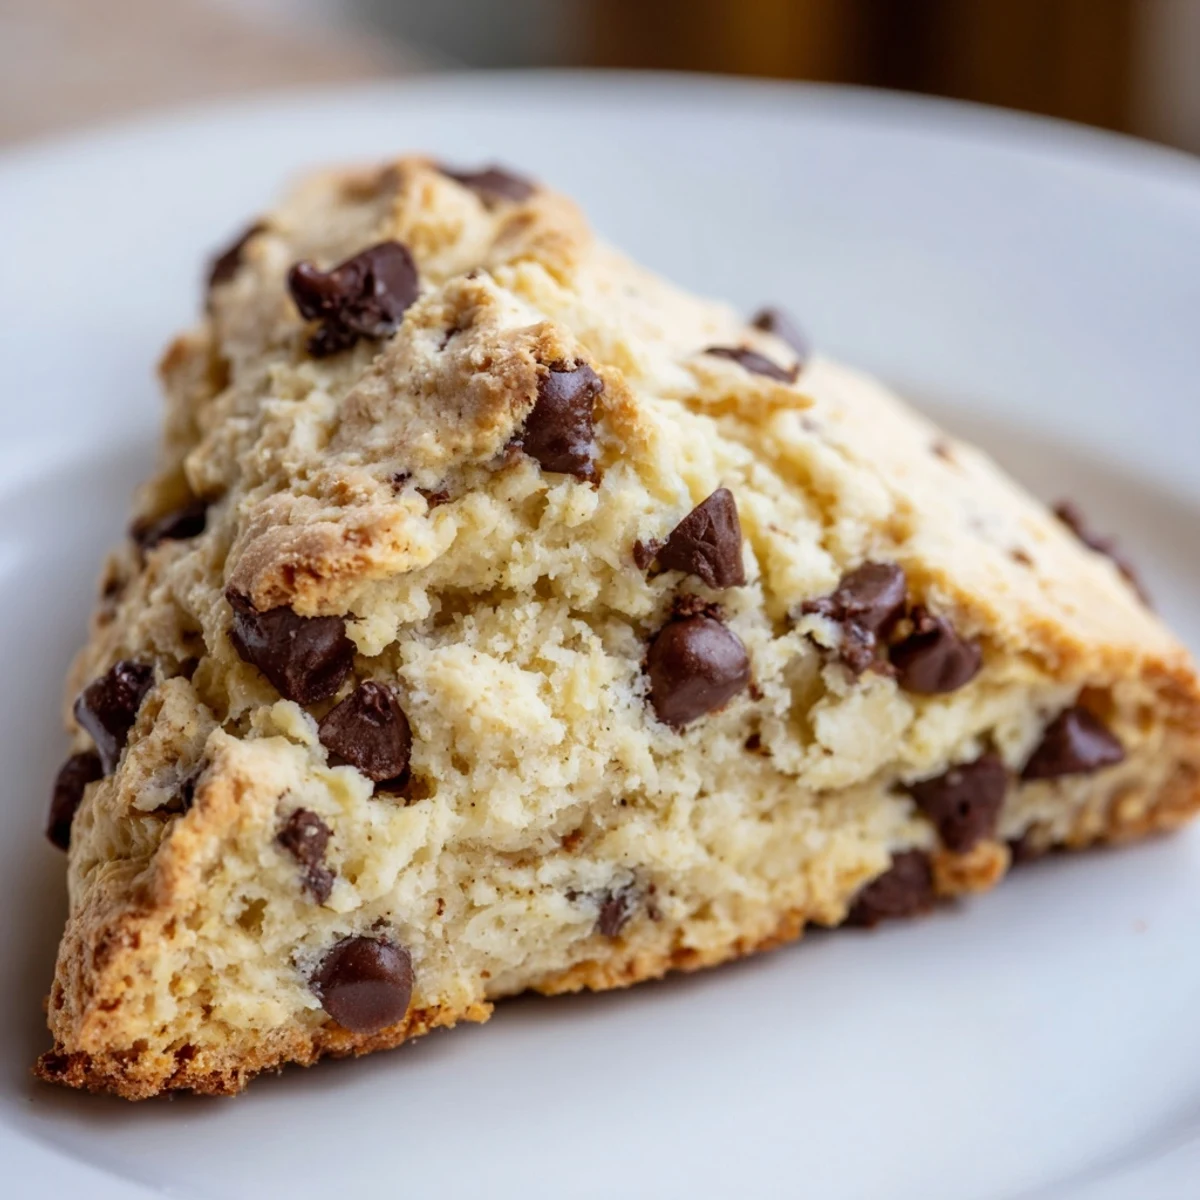
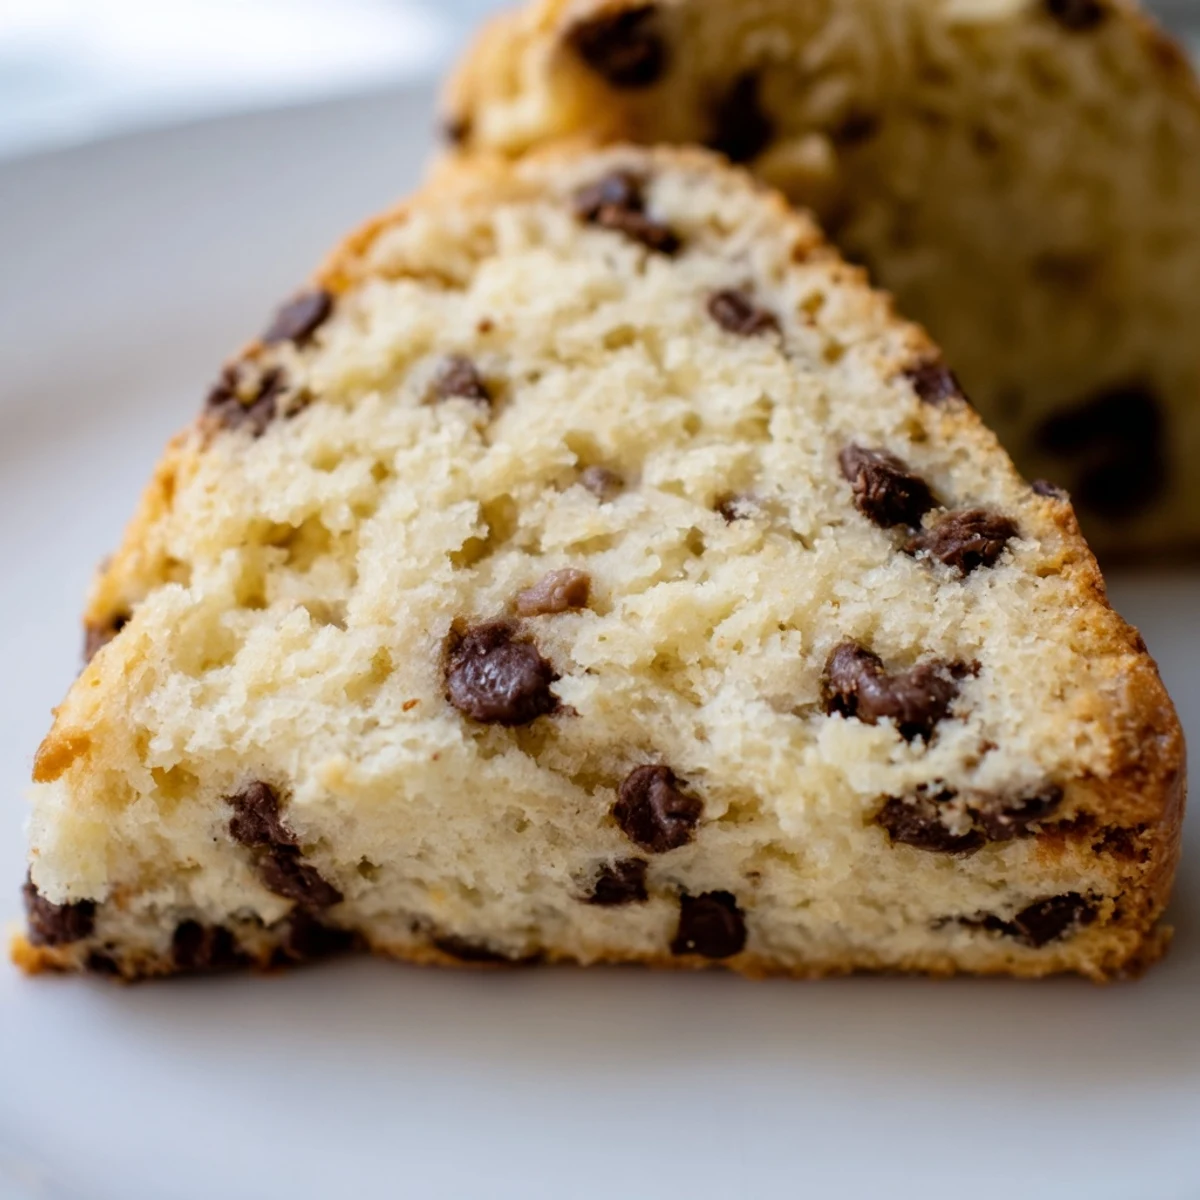
 These delightful baked goods are tender, buttery, and packed with melty chocolate chips, making them an ideal treat for any time of day. Crafted by combining dry ingredients, cutting in cold butter, then gently mixing with a cream, egg, and vanilla blend. Chocolate chips are folded in before shaping and baking until golden brown. Perfect for breakfast with coffee, a sweet afternoon snack, or served with clotted cream. A straightforward bake ready in just over 30 minutes, offering a satisfying homemade indulgence.
The scent of melting butter and warm vanilla always takes me straight back to sleepy Saturday mornings. There's a particular quiet satisfaction in pulling a tray of golden-brown scones from the oven, their chocolate chips still glistening. These chocolate chip scones became a little weekend ritual, an edible hug for everyone who stumbled into the kitchen. They’re proof that simple ingredients can create something truly special.
One blustery autumn afternoon, my friend Sarah dropped by unexpectedly, shivering after walking her dog in the sudden chill. I had just pulled a fresh batch of these out, and the kitchen was wonderfully warm and fragrant. Watching her eyes light up as she bit into a still-warm scone, steam gently rising, felt like a small victory against the grey weather.
Ingredients
- All-Purpose Flour: This forms the tender backbone of our scones—just be sure not to overwork it!
- Granulated Sugar: Not too much, just enough to add a touch of sweetness and help with that beautiful golden crust.
- Baking Powder: Our secret weapon for that enviable scone 'lift' and fluffy texture.
- Salt: Essential for balancing the sweetness and enhancing all the other flavors.
- Unsalted Butter (cold, cut into cubes): This is the star for flakiness; keeping it super cold prevents it from melting too fast.
- Heavy Cream: Provides richness and ensures a wonderfully tender, moist crumb that just melts in your mouth.
- Large Egg: Adds structure and extra richness, making the scones a bit more substantial.
- Vanilla Extract: A splash of warmth and depth that complements the chocolate perfectly.
- Chocolate Chips (semi-sweet or milk): The joyful bursts of melty chocolate in every single bite—don't skimp!
Instructions
- Get Ready to Bake:
- First things first, let's get that oven preheated to 400°F (200°C); then, grab a baking sheet and line it with parchment paper so nothing sticks.
- Combine the Dry Team:
- In a big mixing bowl, whisk together your flour, sugar, baking powder, and salt until they're thoroughly combined and ready for action.
- Work in the Cold Butter:
- Now, add your cold, cubed butter to the dry mixture and use a pastry cutter or your fingertips to cut it in until it resembles coarse crumbs with some pea-sized pieces remaining; remember, cold butter is key for flakiness!
- Whisk the Wet Wonders:
- In a separate, smaller bowl, whisk together the heavy cream, egg, and vanilla extract until they're well blended.
- Bring It All Together:
- Pour the wet ingredients into your flour and butter mixture, stirring gently with a spatula until just combined; seriously, stop as soon as you don't see dry streaks.
- Fold in the Chocolate:
- Gently fold in your chocolate chips; be careful not to overmix here, or your scones might get tough.
- Shape & Pat:
- Turn your shaggy dough out onto a lightly floured surface and gently pat it into a round disc, about 1 inch (2.5 cm) thick; avoid kneading, we want to keep it tender!
- Cut Your Scones:
- Using a sharp knife or a bench scraper, cut the disc into 8 wedges and carefully transfer them to your prepared baking sheet, making sure to space them out a bit.
- Brush for Golden Glory:
- Brush the tops of your scones with a little extra heavy cream; this will help them achieve a beautiful golden-brown finish.
- Bake to Perfection:
- Pop them into your preheated oven for 16–18 minutes, or until they're gloriously golden brown and cooked through.
- Cool & Enjoy:
- Let them cool slightly on the baking sheet before serving; that moment of warmth is when they're truly at their best!
 Save to Pinterest
 These scones became an unofficial staple at our Sunday brunches, particularly when my nieces and nephews were around. There’s something truly heartwarming about seeing little hands reaching for a chocolate-studded treat, their faces sticky with melted chocolate. It transcended a simple recipe; it became a backdrop for laughter, stories, and the general joyful chaos of family gatherings.
The Magic of Cold Butter
When you 'cut in' cold butter, you're creating tiny pockets of butter throughout the dough. As the scones bake, these little pockets release steam, which pushes up the layers of dough, resulting in that wonderfully flaky texture we all adore. If your butter is too warm, it melts into the flour too quickly, and you lose that crucial steam-creating structure.
Gentle Hands for Tender Scones
The key to light, tender scones isn't just about the ingredients; it's about how you handle them. Overmixing develops the gluten in the flour, which leads to a tough, bready texture rather than a delicate, crumbly one. Think of it as a gentle caress rather than an aggressive massage; mix just enough until everything is barely combined, and then stop.
Customizing Your Scone Experience
While these chocolate chip scones are perfect as is, don't be afraid to make them your own! A little orange zest added with the dry ingredients can brighten the flavor beautifully, or you could try swapping half the chocolate chips for dried cranberries. These small additions can completely transform the scone while maintaining its essential comforting character.
- For an extra layer of brightness, stir in about 1/2 teaspoon of orange or lemon zest along with your dry ingredients.
- Serve these warm with a dollop of clotted cream or a smear of good quality butter for an even more indulgent treat.
- Always try to enjoy them fresh; the texture is best on the day they're baked, though they'll keep in an airtight container for a couple of days.
 Save to Pinterest
 There's something truly special about baking from scratch, especially when the result is as comforting and universally loved as these chocolate chip scones. So go ahead, treat yourself and your loved ones to a batch; you'll be so glad you did.
Recipes Q&A
- → What's the secret to tender, flaky scones?
-
The key to achieving tender, flaky scones lies in using very cold butter and handling the dough as little as possible. Cutting cold butter into the flour mixture creates pockets of steam during baking, which results in that desirable texture. Avoid overmixing once wet ingredients are added.
- → Can I use different types of chocolate chips?
-
Absolutely! While semi-sweet or milk chocolate chips are commonly used, feel free to experiment with dark chocolate, white chocolate, or even a mix. Chopped chocolate bars also work wonderfully for a more rustic texture.
- → How should I store leftover scones?
-
Scones are best enjoyed fresh, ideally on the day they are baked. If you have leftovers, store them in an airtight container at room temperature for up to two days. Reheat briefly in a microwave or oven for a fresher taste.
- → What are some ideal serving suggestions?
-
These are delightful on their own, but for a classic experience, serve them warm with a dollop of clotted cream and your favorite fruit preserve. A simple pat of butter or a drizzle of honey also makes for a lovely treat.
- → Can I prepare the dough ahead of time?
-
Yes, you can! You can cut out the scones and place them on a parchment-lined baking sheet, then freeze them until solid. Once frozen, transfer to a freezer bag. Bake directly from frozen, adding a few extra minutes to the baking time. You can also refrigerate the shaped dough for up to 24 hours before baking.
