 Save to Pinterest
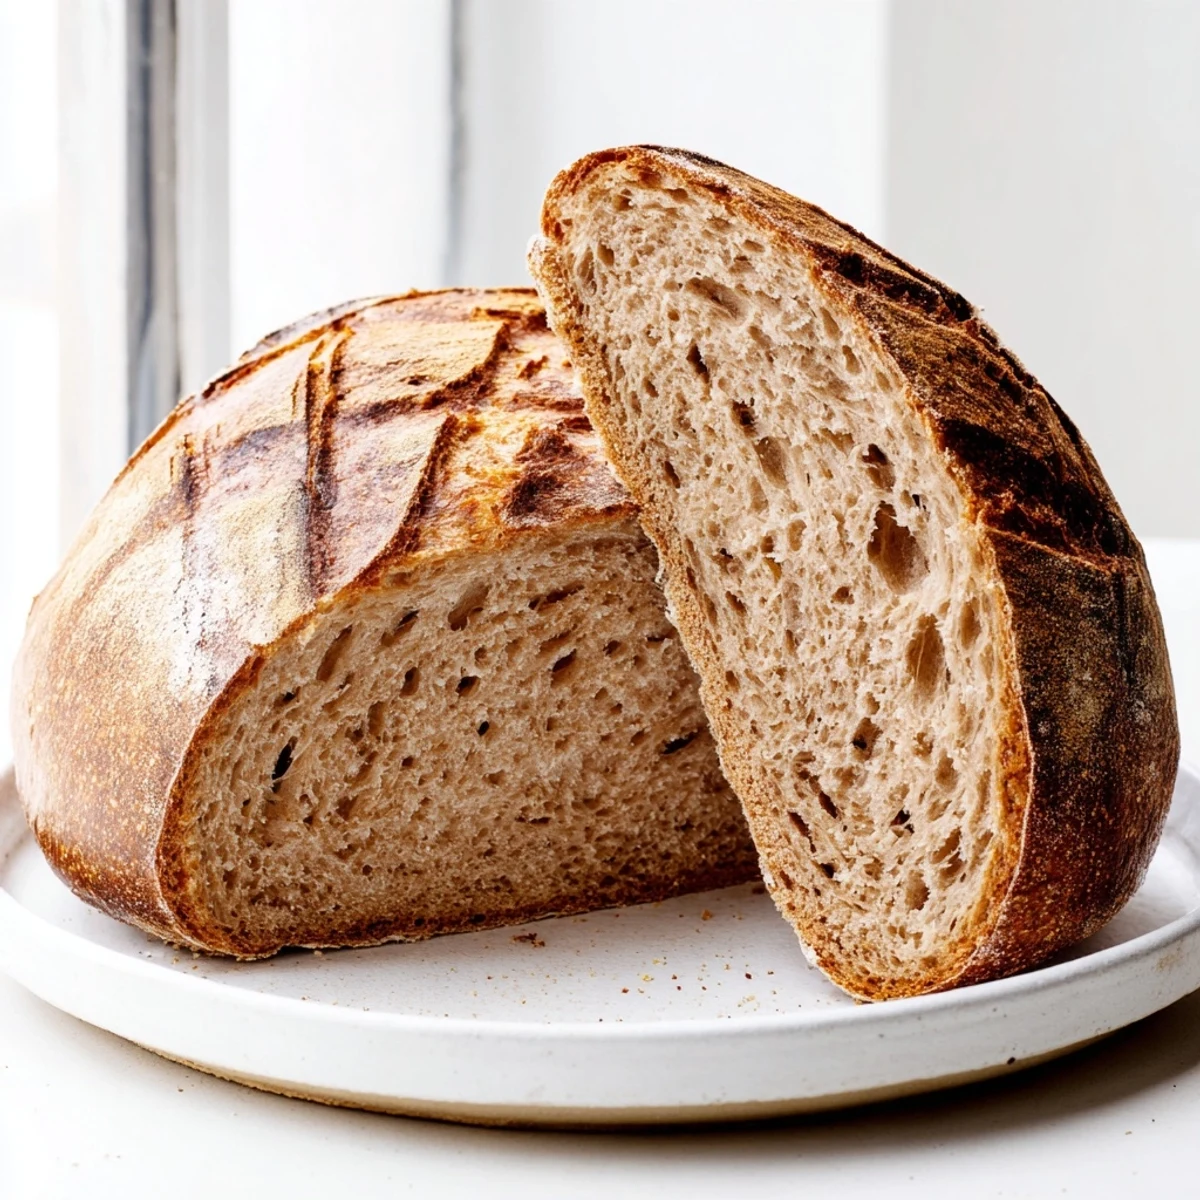
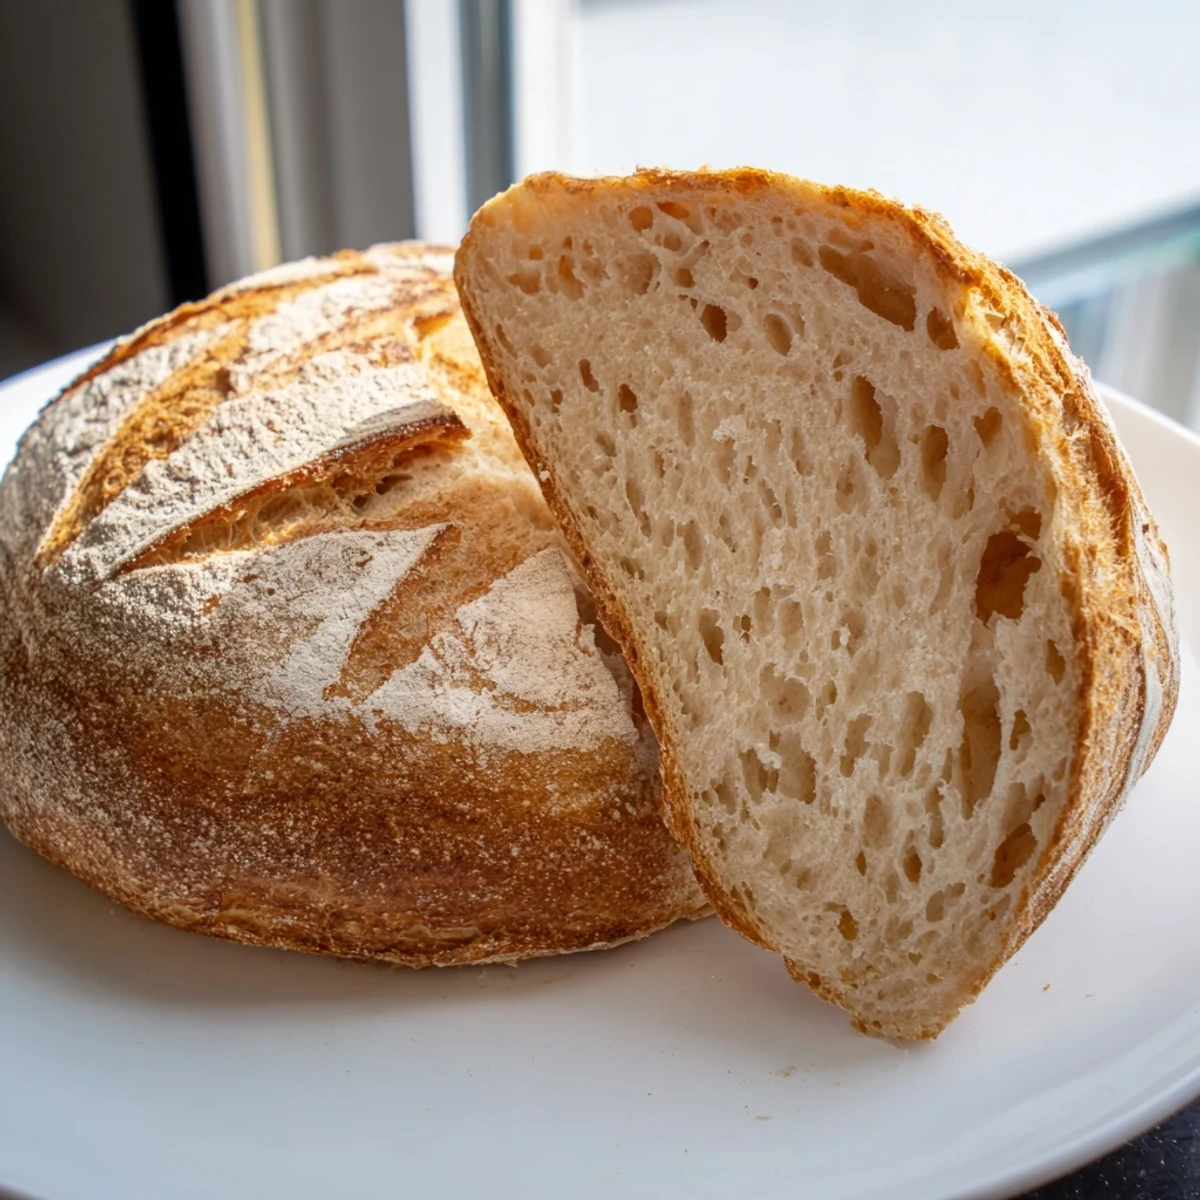
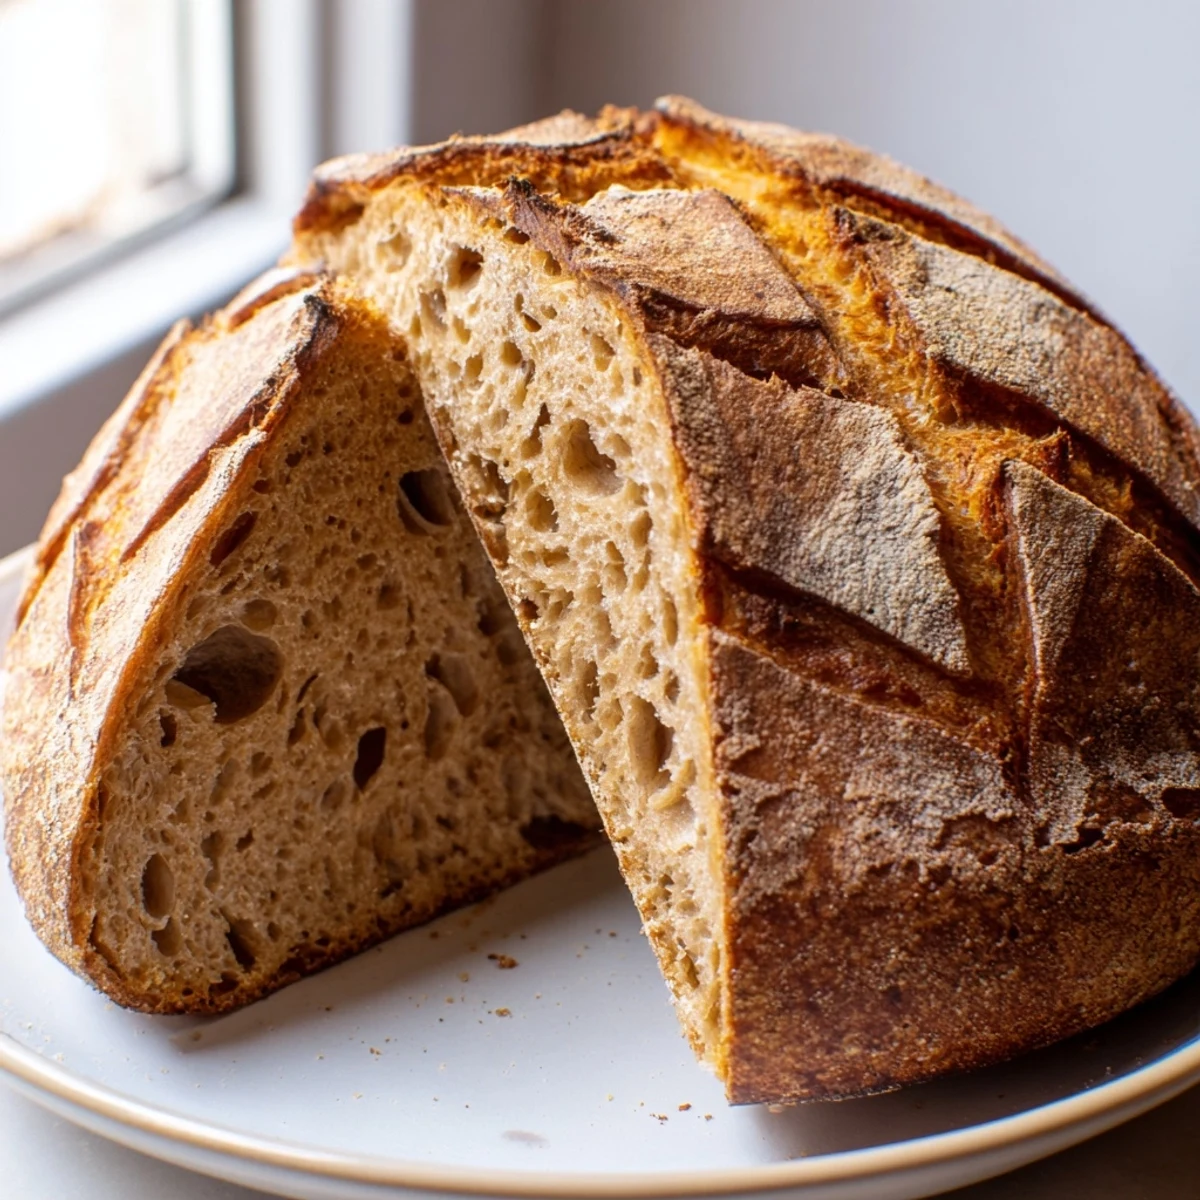
 Craft exceptional artisan sourdough using traditional wild yeast fermentation methods. This naturally leavened bread develops complex tangy flavors through a 14-20 hour fermentation process, achieving signature crackling crust and open airy crumb structure.
The technique combines autolyse rest periods with strategic stretch-and-fold sessions, building proper gluten strength for optimal rise. Final baking in a preheated Dutch oven creates professional steam environment, yielding deep golden crust and exceptional oven spring.
Cold fermentation options enhance sour depth while whole wheat additions contribute subtle earthy complexity. Perfectly suited for experienced home bakers seeking authentic bakery results.
The kitchen counter clock showed 2 AM when my first sourdough finally bubbled to life. Three days of feeding that starter, doubting myself, wondering if wild yeast was actually real or just something bakers told each other to sound mysterious. But when I pulled that first loaf from the Dutch oven and heard the crackling sing-song of a cooling crust, I understood why people get obsessed with bread.
My brother visited last winter and watched the whole stretch-and-fold process like it was a science experiment. He kept asking about the schedule, the timing, the temperature. I told him the best bread happens when you stop watching the clock and start watching the dough. Now he texts me photos of his own loaves at midnight, proud parent energy fully intact.
Ingredients
- 100 g active sourdough starter: This is your wild yeast culture, alive and bubbling after a recent feeding. A mature starter gives better rise and that signature tangy flavor.
- 375 g bread flour: High-protein flour develops strong gluten strands for that classic chewy texture and airy crumb structure.
- 25 g whole wheat flour: Adds depth, nuttiness, and character. You could also try rye for an earthier twist.
- 275 g water room temperature: Hydration makes the crumb tender. Adjust slightly based on your flours absorption.
- 10 g sea salt: Not just for flavor. Salt strengthens gluten and keeps fermentation steady so your bread doesnt taste metallic or overproofed.
Instructions
- Mix and rest:
- Combine the bread flour, whole wheat flour, and water in a large bowl until shaggy and no dry flour remains. Cover and let the dough rest for 1 hour so the flour can fully hydrate.
- Add starter and salt:
- Add your bubbly starter and sea salt to the bowl. Mix by hand, squeezing the dough through your fingers until everything is evenly incorporated.
- Bulk fermentation:
- Cover and let the dough ferment at room temperature for 4 to 5 hours. Every 30 to 45 minutes, grab one edge of the dough and fold it toward the center, rotating the bowl and repeating four times to build strength.
- Pre-shape:
- Turn the dough onto a lightly floured surface and gently shape it into a round. Cover and let it relax for 20 minutes while you prepare your proofing basket with a generous dusting of flour.
- Final shape:
- Shape the dough into a tighter round, creating tension on the surface. Place it seam side up in your floured proofing basket or bowl.
- Proof:
- Cover and let rise at room temperature for 2 to 3 hours. For extra tang and better flavor development, refrigerate overnight instead.
- Preheat your oven:
- Place a Dutch oven or heavy pot with its lid inside your oven and preheat to 480°F for at least 30 minutes. You want that vessel screaming hot.
- Score and bake:
- Gently invert the dough onto parchment paper and score the top with a sharp blade in your chosen pattern. Transfer to the preheated pot, cover, and bake for 20 minutes. Remove the lid, reduce heat to 430°F, and bake another 25 minutes until deeply golden.
- Cool completely:
- Remove the bread from the pot and let it cool on a wire rack for at least an hour. Slicing too early steam-softens that perfect crust you just worked so hard to achieve.
 Save to Pinterest
 That first loaf I made was dense and slightly underproofed, but the flavor stopped me in my tracks. It tasted like patience, like something ancient and alive. Now, Saturday mornings mean sourdough in the oven and coffee brewing. The ritual grounds me in a way that instant yeast never could.
Understanding Your Starter
A healthy starter should double in size 4 to 8 hours after feeding. It should smell pleasant and tangy, not harsh or acetone-like. If yours seems sluggish, try feeding it more frequently or adjusting the ratio of flour to water. Temperature matters too. A cool spot slows fermentation. Warm speeds it up.
Getting the Crust Right
The initial high heat trapped inside the Dutch oven creates steam, which keeps the crust soft and allows maximum oven spring. Removing the lid for the second half of baking dries the crust and creates that deep golden color and satisfying crunch. A fully cooled loaf will have the crispest exterior.
Serving and Storage
Sourdough improves in flavor and texture after sitting for a day. Store it cut side down on a cutting board or in a paper bag. Plastic makes the crust soft. For longer storage, freeze slices wrapped tightly and reheat in a toaster. The classic open-faced sandwich with cultured butter and flaky salt is hard to beat.
- Try a thick slice toasted and topped with smashed avocado and red pepper flakes
- Day old bread makes exceptional croutons or breadcrumbs
- Pair with aged cheddar and a crisp white wine like Sauvignon Blanc
 Save to Pinterest
 Bread making is one of those practices that teaches you more about yourself than about flour. There is a rhythm to it, a seasonal awareness, a quiet satisfaction in feeding something alive.
Recipes Q&A
- → What makes sourdough different from regular bread?
-
Sourdough relies on wild yeast and beneficial bacteria naturally present in flour rather than commercial yeast. This slower fermentation process creates distinctive tangy flavor, improves digestibility, and develops superior texture with extended freshness. The natural acids act as preservatives, keeping loaves fresh longer.
- → How do I know when my starter is active enough?
-
An active starter should be bubbly, doubled in volume 4-8 hours after feeding, and float when dropped in water. It should have pleasant yeasty aroma with slight acidity. Consistency should be thick but pourable, with visible surface bubbles indicating vigorous fermentation activity.
- → Can I skip the Dutch oven for baking?
-
While possible, Dutch oven creates essential steam environment for professional crust development. Alternative methods include placing ice cubes in a preheated pan below your baking stone or using a baking cloche. Without steam, crust becomes thick and tough rather than crackly and delicate.
- → Why is cold fermentation recommended?
-
Refrigerating dough overnight slows fermentation, allowing flavor development through extended enzymatic activity. Cold temperatures promote beneficial acid production, enhancing characteristic sour taste. Chilled dough also handles easier during shaping and transfers to hot oven with better oven spring.
- → How do I achieve proper scoring patterns?
-
Use a razor blade or sharp lame at 45-degree angle, cutting about 1/4 inch deep. Score quickly and confidently without dragging. Simple single slash down center or cross pattern works well for round loaves. Proper scoring controls expansion points, preventing ugly tearing and ensuring attractive appearance.
- → What causes dense bread instead of airy crumb?
-
Dense results often stem from under-proofed dough, insufficient gluten development, or inactive starter. Ensure proper bulk fermentation until dough shows increased volume and visible fermentation bubbles. Complete all stretch-and-fold sequences. Verify starter vitality before beginning. Over-proofing can also cause collapse, leading to tight crumb.
