 Save to Pinterest
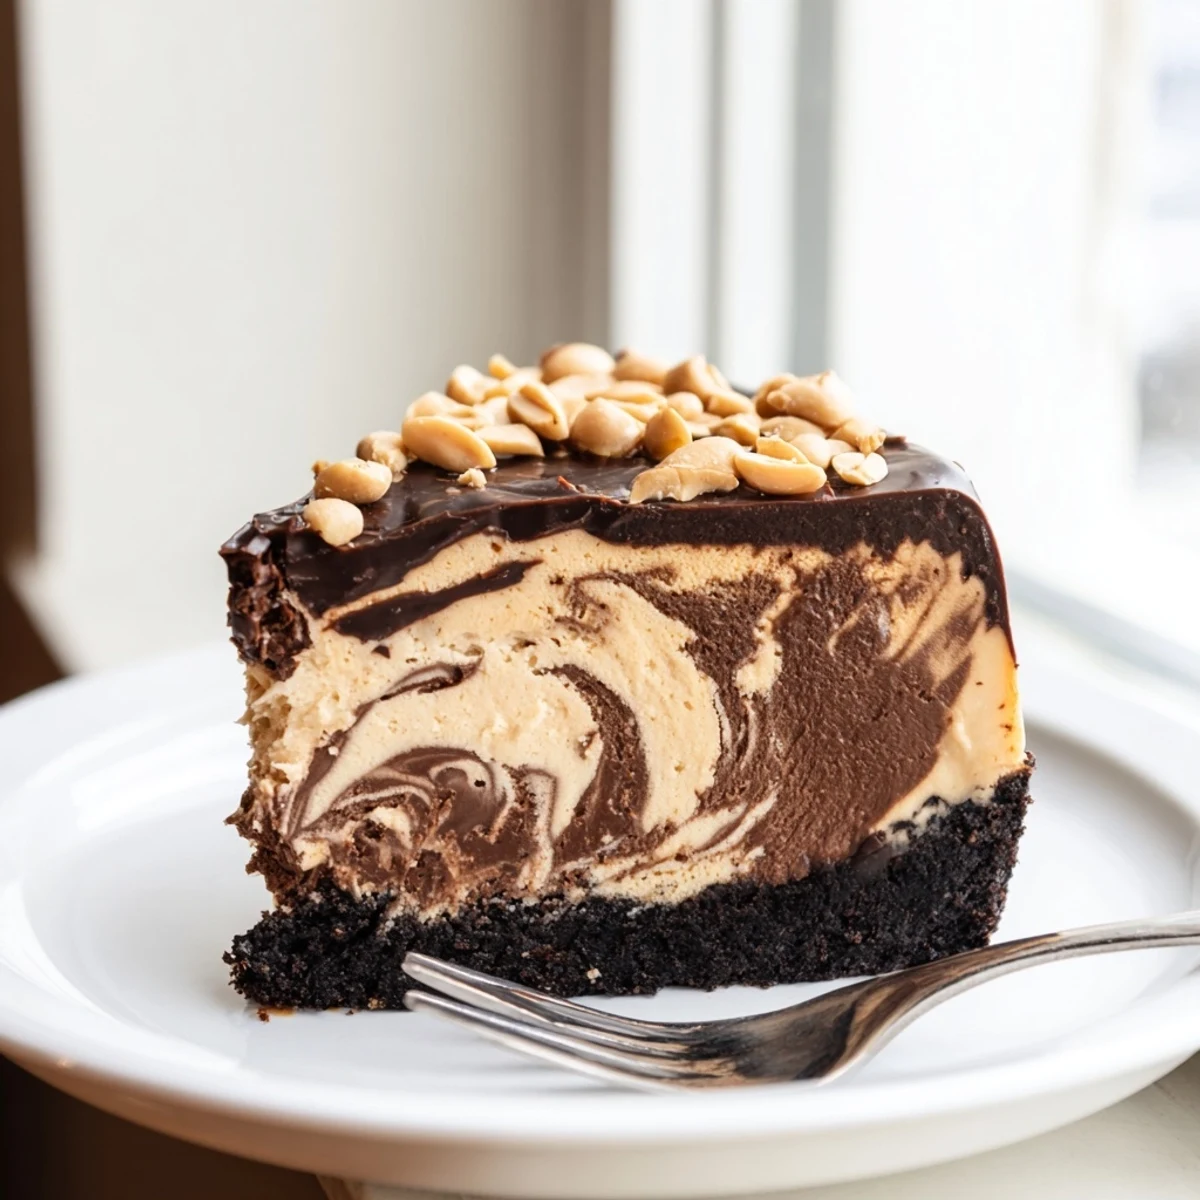
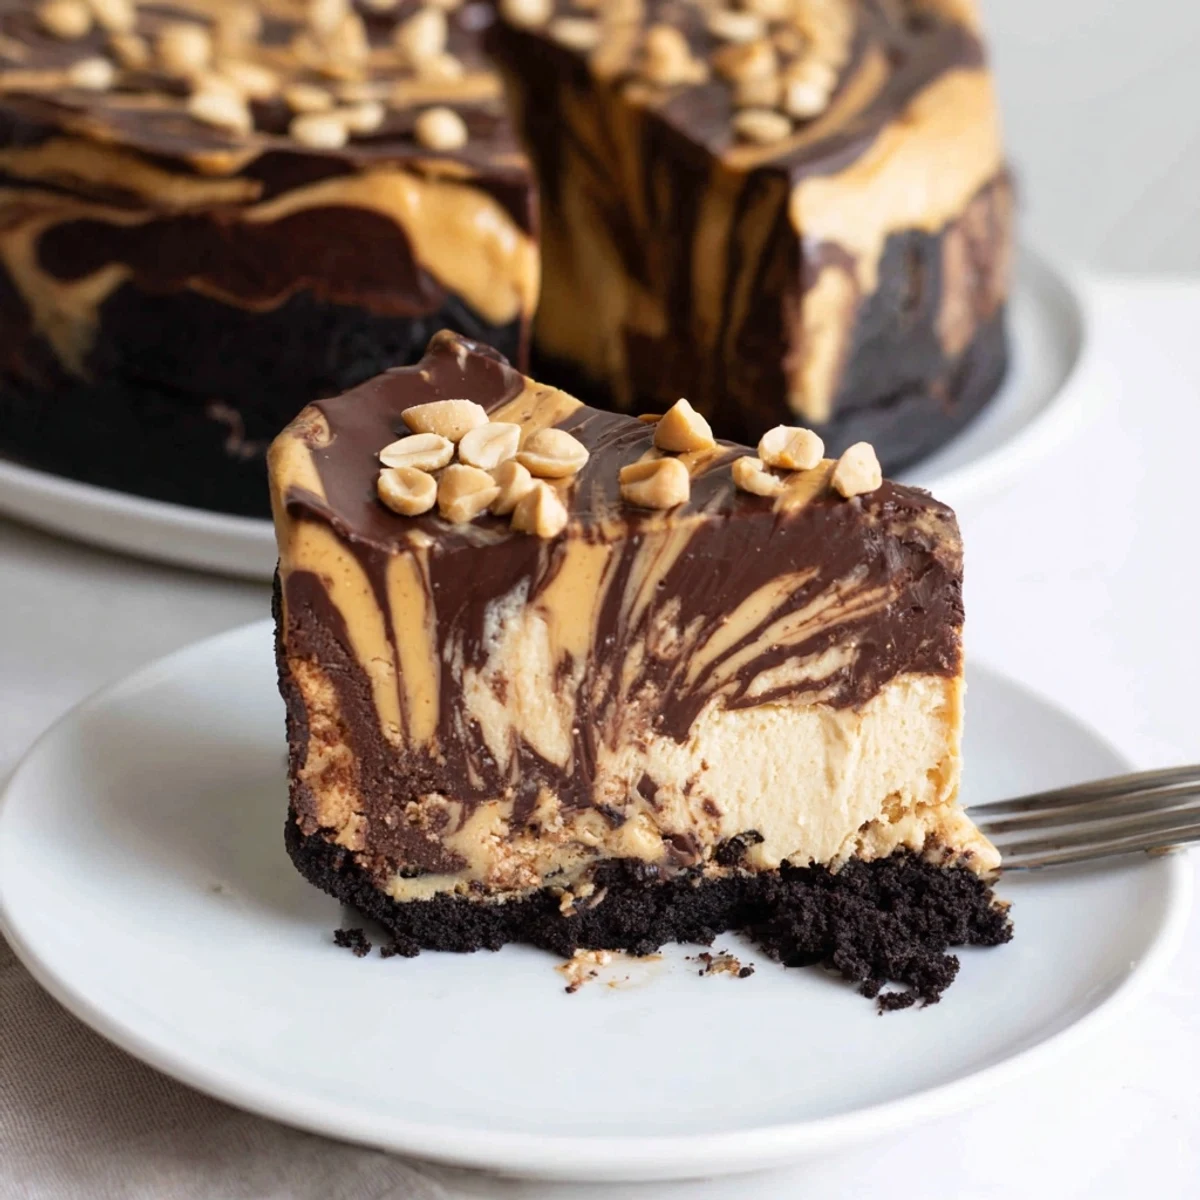
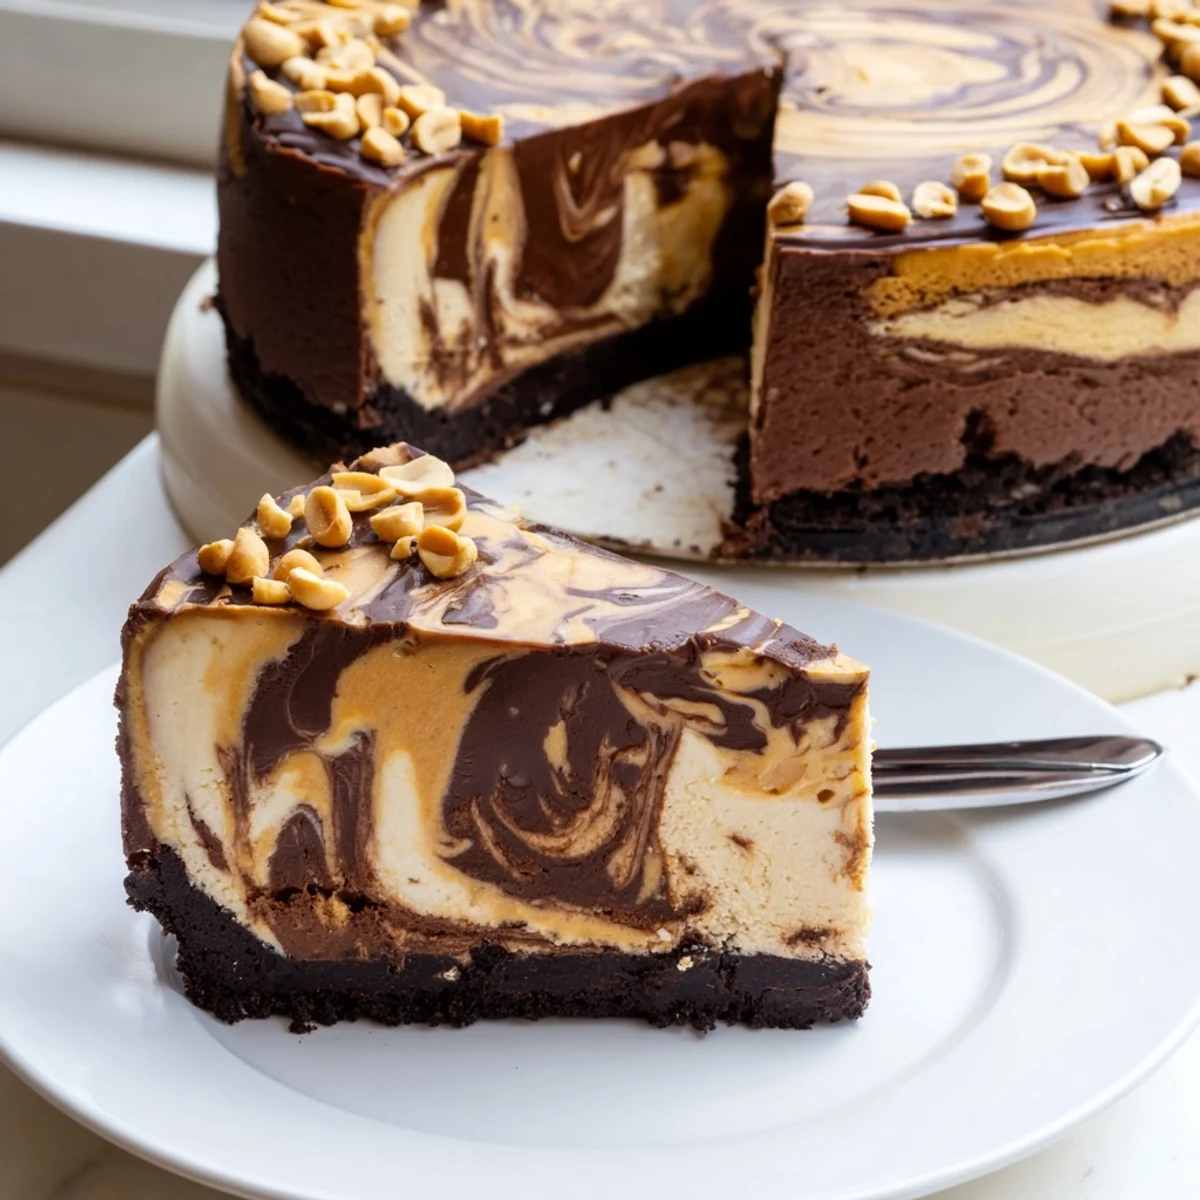
 This chocolate peanut butter cheesecake delivers a luxurious marriage of two beloved flavors in every slice. A buttery chocolate cookie crust forms the foundation for a silky filling, where dark chocolate and peanut butter batters are gently swirled together for a stunning marbled effect.
The cheesecake bakes low and slow for an ultra-creamy texture, then chills overnight to set perfectly. Finished with a glossy chocolate-peanut butter ganache and a sprinkle of roasted peanuts, it's a showstopping dessert worthy of any special occasion.
Plan ahead for the chilling time — it's fully worth the wait.
The exhaust fan was humming louder than usual the evening I pulled together this chocolate peanut butter cheesecake for my neighbor who had just had surgery. She had mentioned offhand that peanut butter anything was her weakness, and I took that as a personal challenge. The smell that filled my kitchen while it baked was so absurdly good that I actually called my mom just to describe it. Six hours of chilling later, I was practically vibrating with excitement to deliver it.
When I dropped off the cheesecake, my neighbor stood in her doorway eating a slice right out of the container with a plastic fork, not even bothering to close her front door. Her husband appeared behind her, tasted a bite, and immediately asked if I could make another one for his birthday. That reaction alone was worth every minute of chilling time.
Ingredients
- Chocolate sandwich cookies (200 g): Oreos are the classic choice here, and you want them crushed fine enough that no large chunks poke through the crust.
- Unsalted butter (60 g), melted: This binds the cookie crumbs together and helps the crust firm up beautifully during its brief bake.
- Cream cheese (600 g), softened: Cold cream cheese will leave you with lumpy batter, so let it sit out until it truly yields when you press it with a finger.
- Smooth peanut butter (200 g): Use a standard commercial brand like Jif or Skippy rather than natural or stir varieties, which can separate and cause texture problems.
- Granulated sugar (200 g): This amount balances the deep richness of the chocolate and the saltiness of the peanut butter without tipping into overly sweet territory.
- Large eggs (3): Adding them one at a time on low speed keeps the batter smooth and prevents incorporating too much air, which causes cracks.
- Vanilla extract (1 tsp): A small amount rounds out the flavor profile and brings warmth to both the chocolate and peanut butter layers.
- Sour cream (120 ml): This is the secret to a silky, tender crumb that slices cleanly rather than turning dense or rubbery.
- Dark chocolate (100 g for filling plus 120 g for topping), melted: Use something around sixty to seventy percent cacao for enough intensity to hold its own against the peanut butter.
- Heavy cream (120 ml): This transforms the chopped chocolate into a pourable ganache that sets with a professional looking shine.
- Creamy peanut butter (2 tbsp, for topping): Swirled into the warm ganache, it creates a two toned finish that echoes the marbled filling below.
- Chopped roasted peanuts (optional): A scatter of these on top adds a welcome crunch that contrasts with all that creamy richness underneath.
Instructions
- Prep the pan and oven:
- Heat your oven to 160 degrees Celsius (325 degrees Fahrenheit), then grease and line a 23 cm springform pan with parchment so nothing sticks when you release it later.
- Build the crust:
- Toss the crushed cookies with melted butter until every crumb glistens, then press the mixture firmly and evenly across the bottom of the pan. Bake for ten minutes until it smells toasty and let it cool while you work on the filling.
- Start the filling:
- Beat the softened cream cheese and sugar together in a large bowl until completely smooth and no pale streaks remain, then blend in the peanut butter until fully incorporated.
- Add the eggs and extras:
- Drop in the eggs one at a time, beating on low after each until just combined, then stir in the vanilla and sour cream without overmixing.
- Split and flavor the batter:
- Divide the filling evenly between two bowls and fold the melted chocolate into one half, stirring gently until it becomes a uniform deep brown.
- Create the marble:
- Pour the chocolate batter over the cooled crust and spread it flat, then spoon the peanut butter batter on top in gentle dollops. Drag a knife through both layers in wide S shapes for that gorgeous marbled look.
- Bake low and slow:
- Bake for fifty to sixty minutes until the outer ring looks set and dry but the center still has a slight wobble when you nudge the pan. Turn off the oven, crack the door open, and let the cheesecake cool inside for one full hour to prevent sudden cracking from temperature shifts.
- Chill thoroughly:
- Transfer the cooled cheesecake to the refrigerator for at least four hours or, ideally, overnight so the filling can fully set into that dense creamy slice you are dreaming of.
- Make the ganache topping:
- Heat the cream in a small saucepan until it steams but does not boil, then pour it over the chopped chocolate and stir until the mixture goes glossy and smooth. Stir in the peanut butter, let it cool slightly until it thickens just enough to spread, then blanket it evenly over the chilled cheesecake.
- Garnish and serve:
- Scatter chopped peanuts over the top if you want that extra crunch factor, then slice with a warm clean knife for the neatest presentation.
 Save to Pinterest
 Somewhere between the second and third slice disappearing on my neighbor birthday, I realized this cheesecake had become less of a recipe and more of a standing request I would never escape.
Choosing Your Chocolate
I tested this with everything from grocery store baking bars to fancy single origin chocolate, and the truth is that any decent dark chocolate between sixty and seventy percent cacao works beautifully. Go much darker and the bitterness starts fighting the peanut butter instead of complementing it.
Getting That Clean Slice
Run your knife under hot water, dry it off, and cut in one confident stroke rather than sawing back and forth. Wipe the blade clean between each cut and your slices will look like they came from a bakery display case.
Make It Your Own
This recipe is endlessly adaptable once you understand the basic structure of crust, filling, and topping.
- Swap the cookie crust for graham crackers if you want a lighter base that lets the filling steal the show.
- Fold a handful of mini chocolate chips into the peanut butter batter half for surprise pockets of texture.
- Always taste your peanut butter before adding it, because salt levels vary wildly between brands and can throw off the balance.
 Save to Pinterest
 Every time I make this cheesecake, someone asks for the recipe, and I always say the same thing: the hardest part is waiting for it to chill. Trust the process, set your timer, and go do something else while the magic happens.
Recipes Q&A
- → Can I make this cheesecake ahead of time?
-
Yes, this cheesecake actually tastes better when made a day in advance. The flavors meld and the texture firms up beautifully after chilling overnight. It will keep in the refrigerator for up to 5 days, covered tightly with plastic wrap.
- → Why did my cheesecake crack on top?
-
Cracks usually occur from overmixing the batter (incorporating too much air), baking at too high a temperature, or sudden temperature changes. Baking at 160°C in a water bath helps prevent cracking. The low-and-slow cooling method inside the turned-off oven also minimizes this issue.
- → Can I use natural peanut butter instead of smooth?
-
Standard smooth peanut butter works best for a creamy, consistent filling. Natural peanut butter tends to separate and can make the texture grainy or oily. If you only have natural peanut butter, stir it very thoroughly before measuring and consider adding an extra tablespoon of flour to stabilize the batter.
- → How do I get clean slices when cutting the cheesecake?
-
Use a sharp knife dipped in hot water and wiped clean between each cut. The warm blade glides through the cheesecake cleanly. For the neatest results, slice while the cheesecake is still well-chilled straight from the refrigerator.
- → Can I freeze this cheesecake?
-
Absolutely. Wrap individual slices or the whole cheesecake tightly in plastic wrap, then in aluminum foil. Freeze for up to 2 months. Thaw overnight in the refrigerator before serving. The topping may lose some glossiness after freezing but the flavor and texture will remain excellent.
- → What can I substitute for the chocolate sandwich cookies in the crust?
-
Any crisp chocolate cookie or graham cracker works well. For a gluten-free version, use your preferred GF chocolate cookie. You could also use digestive biscuits with a tablespoon of cocoa powder mixed in for a chocolatey base.
