 Save to Pinterest
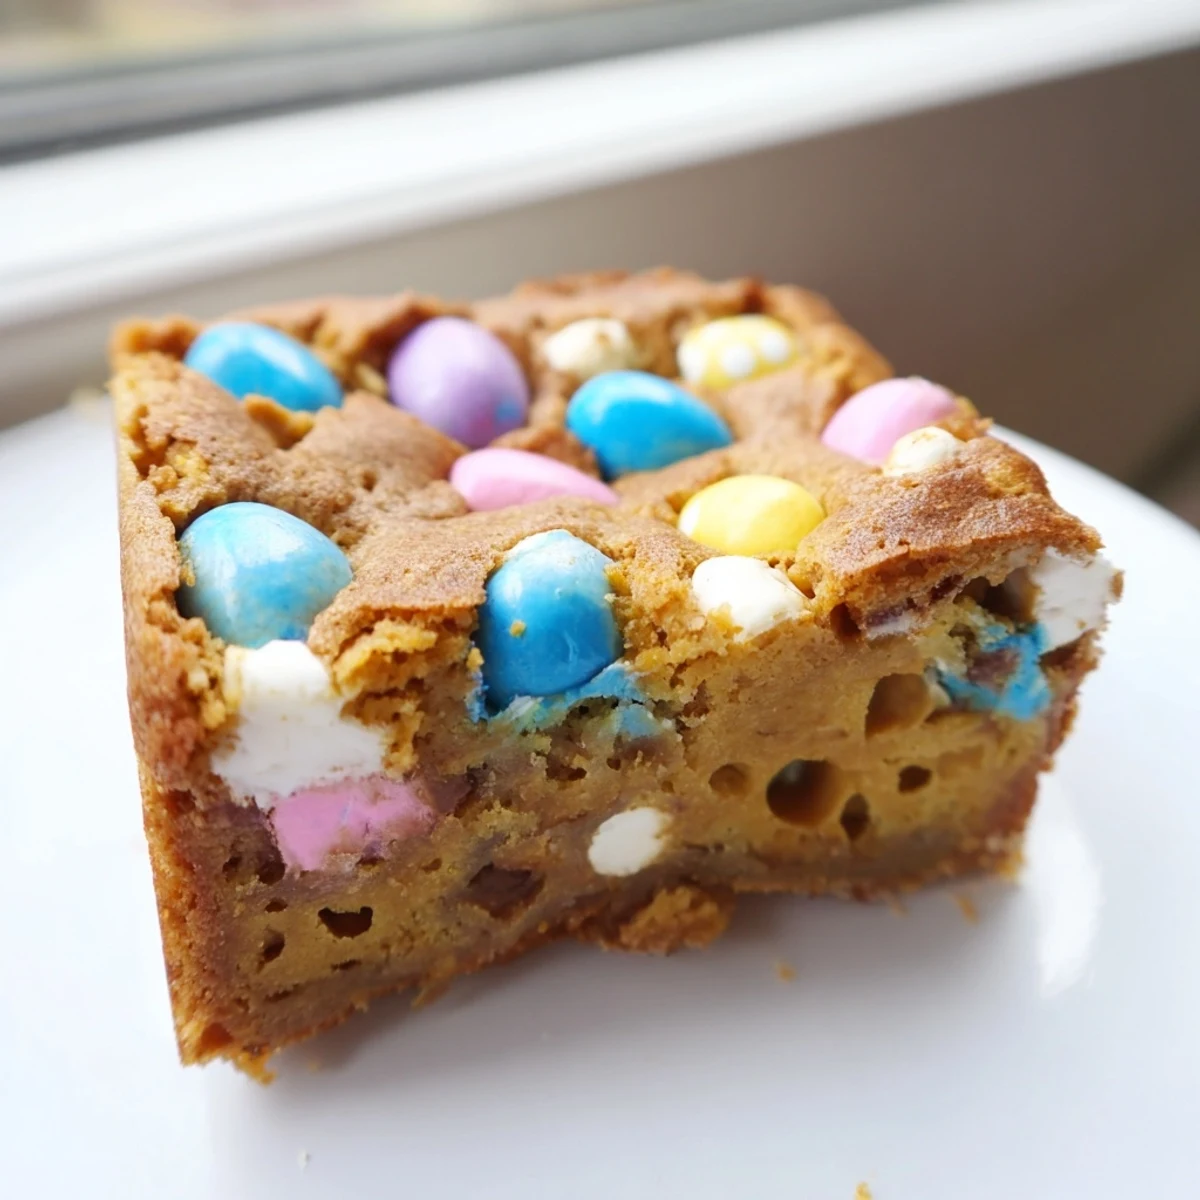
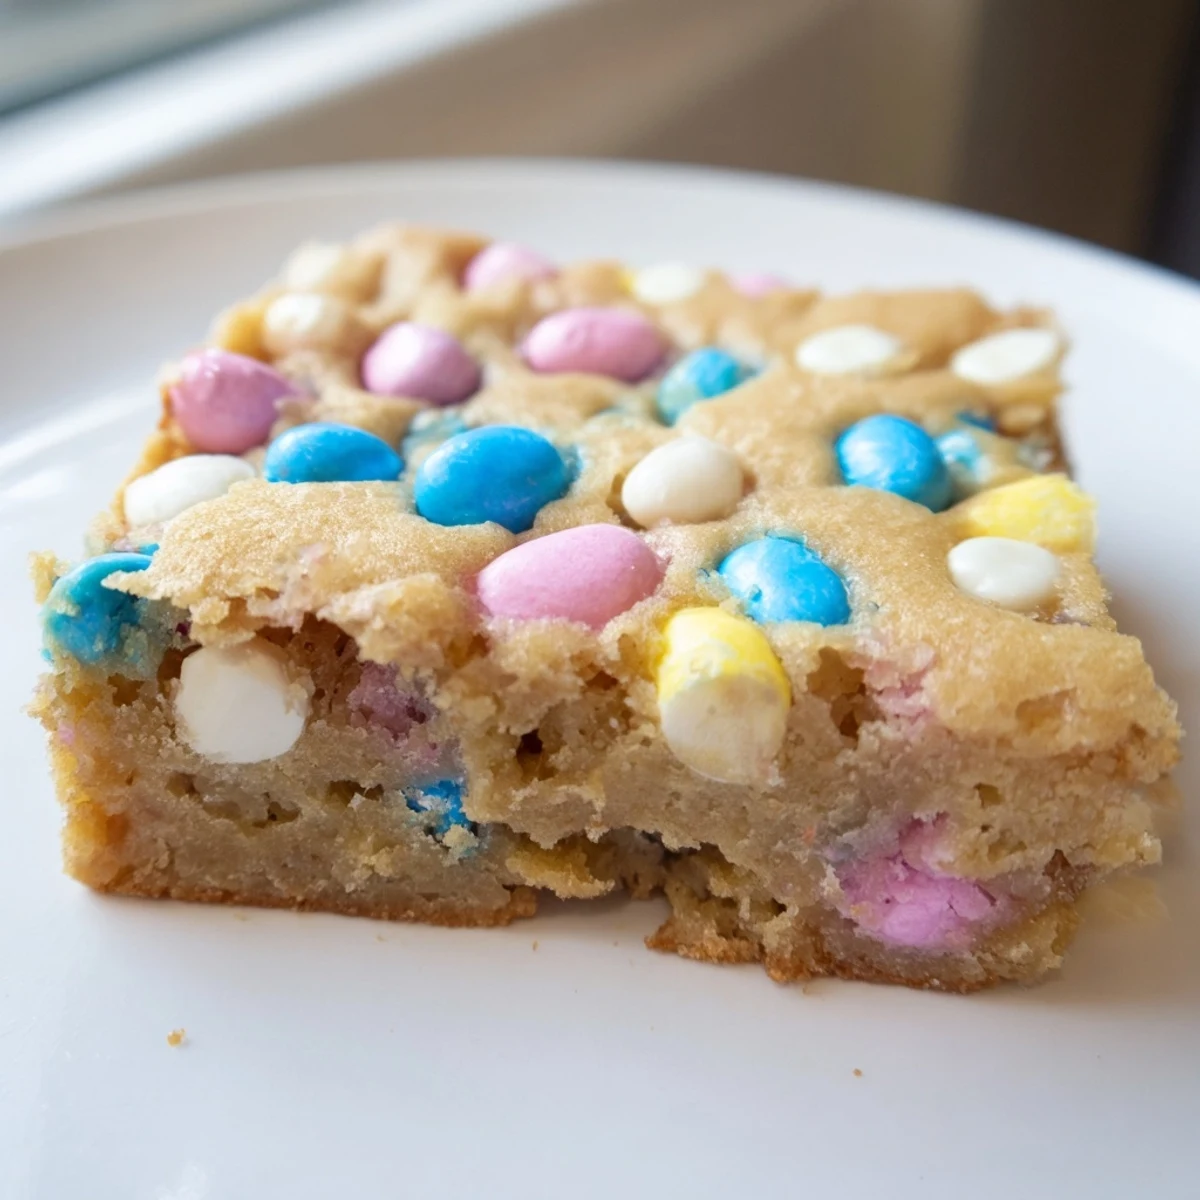
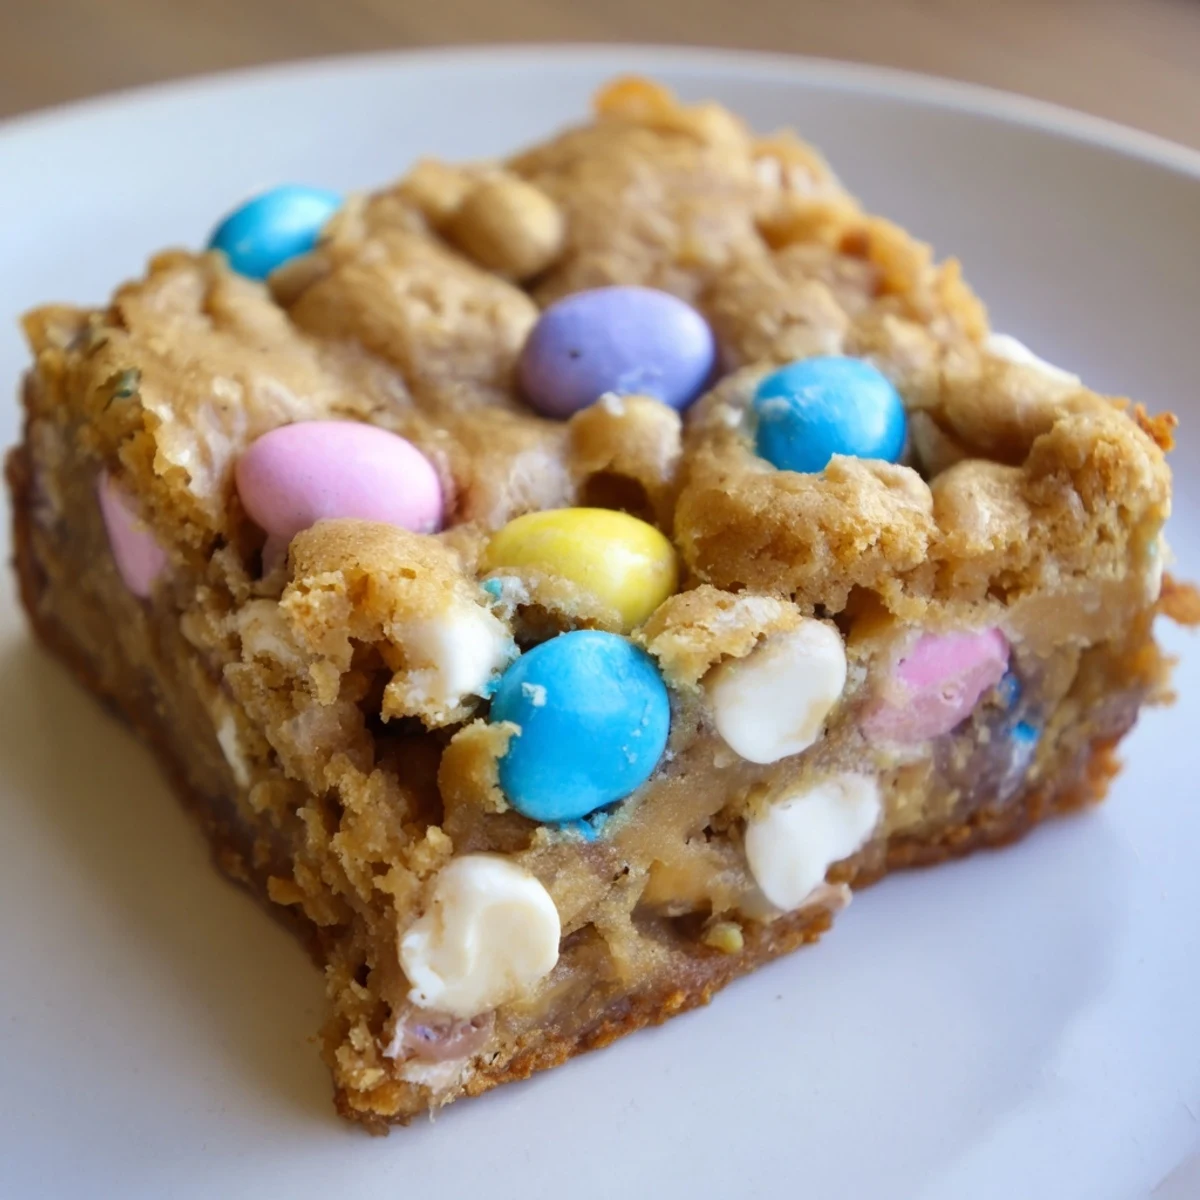
 These chewy, golden blondies feature a rich buttery base swirled with white chocolate chips and generously studded with colorful Mini Cadbury Easter Eggs. The combination creates irresistible pockets of creamy sweetness throughout every bite. Ready in just 40 minutes, these squares develop a tender, fudgy center with slightly crisp edges—ideal for spring gatherings, Easter dessert tables, or afternoon treats.
Last Sunday, my six-year-old burst through the back door with a slightly squashed cardboard bunny clutched in one hand and the most determined expression I've ever seen. Mommy, we HAVE to bake something with these right now. So we did, and these blondies have somehow become the official herald of spring in our kitchen ever since that spontaneous afternoon.
I brought these to my book club last month when we were discussing something literary and pretending to be sophisticated adults. Within three minutes, someone had chocolate on their chin and we were all arguing over who got the corner pieces. Books were forgotten, second helpings were taken, and I've been texted about them three times this week already.
Ingredients
- All-purpose flour: The structure that holds everything together without making them cakey or tough
- Baking powder: Just enough lift to give them that perfect rise without turning them into cake
- Salt: Absolutely essential for balancing all that sugar and making the chocolate sing
- Unsalted butter: Melted creates that dense fudgy texture we're chasing here
- Light brown sugar: The secret weapon for chewiness and that gorgeous caramel undertone
- Granulated sugar: Creates that irresistible crackly sugar crust on top
- Eggs: Room temperature eggs incorporate better and help achieve that perfect texture
- Vanilla extract: Don't skip this, it amplifies all the other flavors
- Mini Cadbury Easter Eggs: The star of the show, chopped into various sizes for distribution
- White chocolate chips: Creamy little pockets that complement the candy eggs perfectly
Instructions
- Get your oven ready:
- Preheat to 350°F and line an 8x8-inch pan with parchment paper, letting the edges hang over like a little sling for easy lifting later.
- Whisk the dry team:
- In a medium bowl, combine flour, baking powder, and salt until everything is evenly distributed.
- Mix the butter and sugars:
- Whisk melted butter with both sugars until you have a smooth, glossy mixture that smells like caramel.
- Add the wet ingredients:
- Beat in eggs and vanilla until the mixture looks satiny and slightly lighter in color.
- Gentle fold time:
- Fold in the dry ingredients with a spatula until just combined, then stir in most of your candy, saving some pretty pieces for the top.
- Top and bake:
- Spread into your prepared pan, scatter those reserved Mini Eggs on top, and bake for 23 to 26 minutes until golden with moist crumbs.
- The hardest part:
- Let them cool completely in the pan before cutting into squares, though I won't tell if you taste-test a warm corner piece.
 Save to Pinterest
 My neighbor's daughter asked if I could teach her to make these for her school bake sale, and watching her carefully chop the candy eggs with such concentration reminded me why I fell in love with baking in the first place. She took home a container of slightly imperfect squares and came back two days later asking for the recipe, which is basically the highest compliment I can imagine receiving.
Getting The Perfect Texture
The difference between a good blondie and a great one comes down to pulling them from the oven at exactly the right moment. I've learned that when the edges are set and golden but the center still has a tiny bit of wobble, that's your sweet spot. They continue cooking in the pan and set into that perfect dense chewiness we're all here for.
Make Them Your Own
While Mini Eggs are obviously fantastic here, this base recipe is incredibly forgiving. I've made versions with chopped milk chocolate bars, swirls of peanut butter, and even a handful of salted pretzels for that sweet salty situation nobody can resist. The white chocolate can absolutely be swapped for whatever baking chips you have hiding in your pantry.
Storage And Serving
These actually develop more flavor on day two, if you can manage to keep them around that long. The sugar crust softens slightly into the blondie and the candy pieces become even more integrated. If you're serving them at a party, a quick 15-second zap in the microwave makes them taste freshly baked.
- Try serving them with vanilla bean ice cream for an over-the-top spring dessert
- Cut them into smaller squares if you're feeding a crowd or want to stretch the batch
- Wrap individual portions in plastic wrap and freeze for up to two months
 Save to Pinterest
 Hope these bring as much joy to your kitchen as they've brought to mine. Happy baking!
Recipes Q&A
- → Can I use regular Cadbury Eggs instead of Mini Eggs?
-
Yes, simply chop full-sized Cadbury Creme Eggs into smaller pieces. The filling will add extra sweetness and create gooey pockets throughout the blondies.
- → How do I know when the blondies are done baking?
-
Insert a toothpick into the center—it should come out with a few moist crumbs rather than wet batter. The edges should appear golden and slightly set while the center remains soft.
- → Can I make these ahead of time?
-
Absolutely. These blondies keep well in an airtight container for up to 4 days. They actually taste even better the next day as the flavors meld together.
- → Why did my blondies turn out cakey instead of chewy?
-
Overmixing the batter or overbaking can cause cakey texture. Fold ingredients gently and remove from the oven when a toothpick shows moist crumbs rather than clean.
- → Can I freeze these blondies?
-
Yes, wrap individual squares tightly in plastic wrap and freeze for up to 3 months. Thaw at room temperature for 1-2 hours before serving.
- → What can I substitute for white chocolate chips?
-
Milk chocolate, dark chocolate, or even butterscotch chips work beautifully. Each variation creates a different flavor profile while maintaining the chewy texture.
